How to save hundreds per year by refilling your ink cartridges
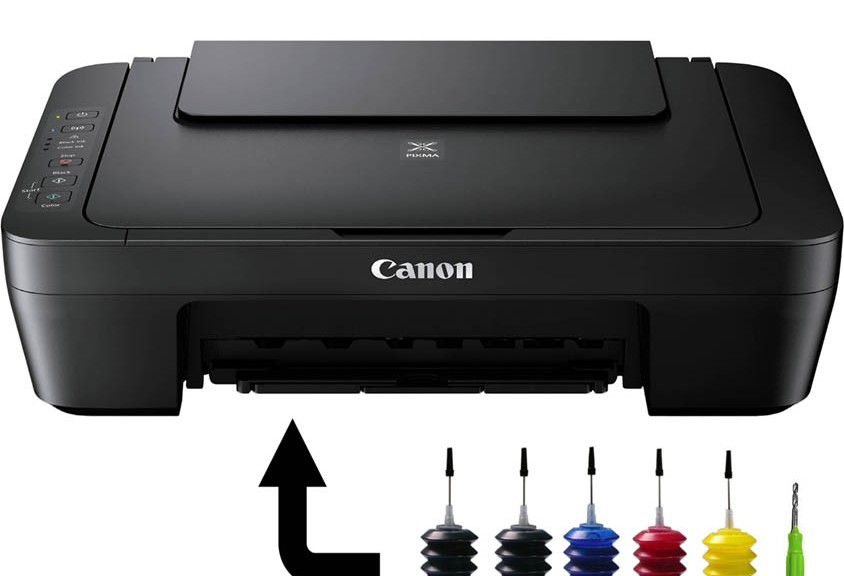
Did I ever tell you about the time I spent $3.00 to refill my $30 ink cartridge? The performance and quality was just the same and no noticeable difference can be seen to the average person. Ink is expensive so it makes sense to find a cheaper alternative. Check out this really short guide to refilling ink with dirt cheap refill kits. This is an example using a Canon MG series inkjet printer.
Overpriced Ink
It’s no surprise that ink is overpriced. I bought an inkjet printer all-in-one last December for $20 at Walmart. It came with the most ridiculously small ink cartridges you can imagine. The cheap deal was really good for an all-in-one, but I had no idea the black ink itself was $30! This means that a single black ink cartridge was being sold for more than the original printer and included black and color ink cartridges were together. I had to put my research and tech skills to the task again. After all, why not save some more money? It didn’t take me long to find a black ink refill kit for my inkjet printer. The price was about $3.00 with free shipping from eBay.
Refilling Your Cartridge
Here’s what you need to do first, before buying a refill kit. Check Google to make sure someone else has done it successfully. Manufacturers try everything they can to make it hard for you to refill ink yourself. Some will try to have a chip and software that detects ink tampering. Other models will require you to do a reset of the ink lights to trick the printer into thinking new cartridges have been installed. The steps to refill ink, if you can find a refill kit, are pretty easy.
There’s no guarantee that this will work for your specific printer, but it’s worth a try. You’re going to throw away your empty cartridge anyway!
If you found a refill kit from a reputable source, then proceed to the equipment needed.
Equipment Needed
A refill kit means you will be likely drilling a hole in the print cartridge. You will use a tool that has a needle on it and bulb of new ink. Once you drill the hole, you insert the needle and squeeze ink into the cartridge. Yes, this can be a messy process, if you’re not careful and don’t wear some gloves. Don’t get overwhelmed, they purposely make you do this to make it less convenient. In the end, you will save money so just stick to the instructions.
You will need a piece of clear packing tape, the new ink refill kit (syringe, ink bulb, protective cap that you will place on ink once you’re done using the refill bottle), electric drill, drill bit, gloves, and an old towel to provide a surface that protects the floor from ink spills. Use a 3/32 or 5/64 drill bit, which is small enough to allow the syringe to pass through.
Do not try this on top of your carpet or anything you don’t want ink spilling onto.
Refill Steps
The first and hardest step is drilling the hole. The hole should be drilled towards the center of the ink cartridge on the top. You can’t drill the hole until you remove the top sticker on the print cartridge. After you remove the sticker, you should see an area you can drill into.
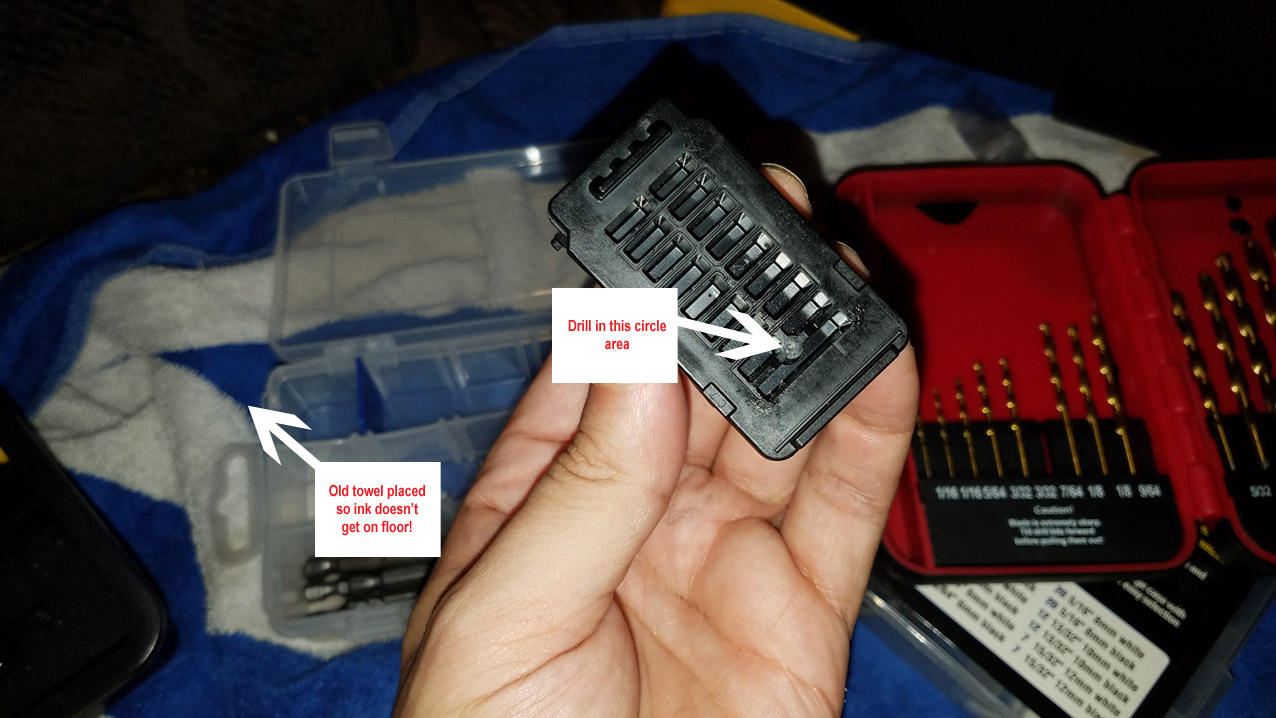
Don’t drill to deep. Drilling should be slow and with little to no pressure pushing down. Let the drill bit slowly drill until you feel no more resistance – you’re in! Before you do anything else, while holding the cartridge upright, blow hard on the top to remove any lose drill shavings. Do not turn the cartridge upside down now, ink will come out.
Next, get your ink refill bulb and syringe. Remove the syringe ink cap and then insert the needle until you feel some resistance (deep into the ink cartridge). Gently squeeze the plunger/bulb to push ink through the syringe. Stop and wait, if you see ink bubble back up through the top of the cartridge. You want to refill the cartridge as slow as possible and with little to no air bubbles. Don’t fill the ink cartridge too much. You should not have ink overflowing out of the top of the cartridge.
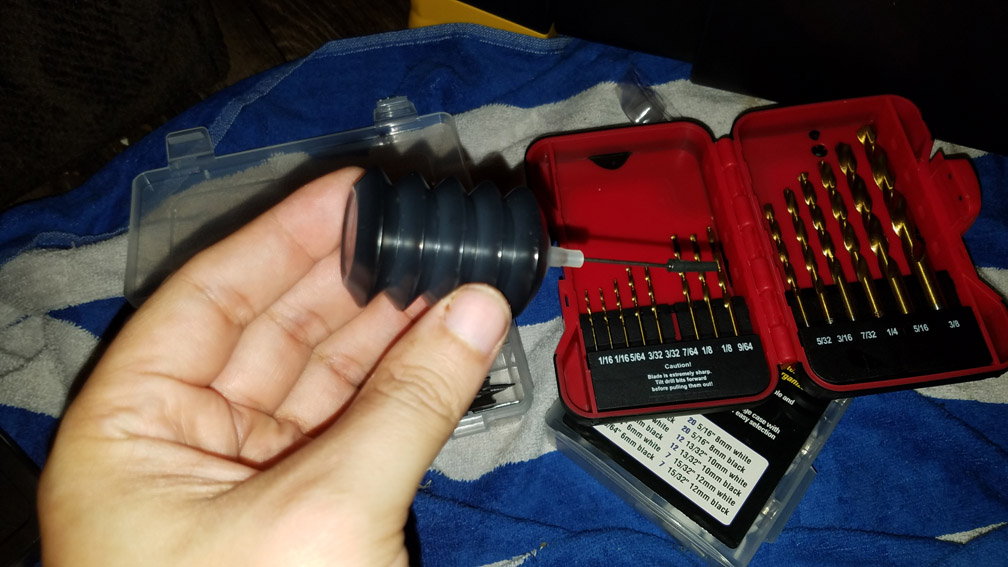
Once you are done filling the ink, remove the syringe, and then place the cap back on the refill kit. This keeps ink from coming out of the syringe of the refill kit (you can use more later).
The next step would be to take a towel and just wipe the sides or any part of the outside cartridge to remove excess ink. Once you’ve done this, get your piece of tape ready.
Place a piece of clear packing tape (long enough) to cover the cartridge, from the top left side of the cartridge to the top right side. This will create a temporary cover to keep ink in the printer and prevent exposure to the outside air. You don’t want any impurities in the ink, which is the technical reason for doing this step.
Because your cartridge sits in the printer upright, and you placed tape over the opening you made on the top, there should be no ink leakages.
Ink Errors
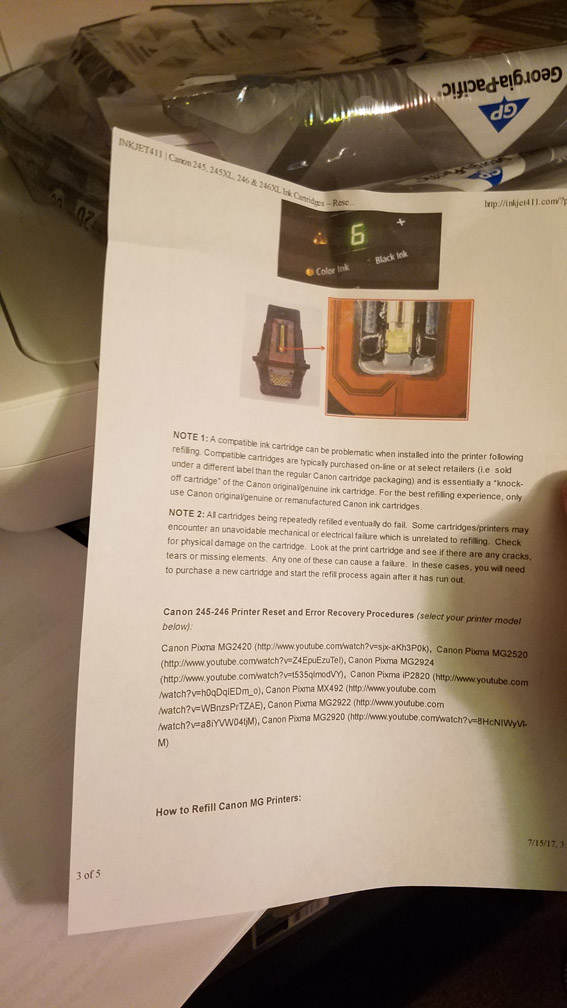
When you’re done refilling the ink cartridge, treat it like you’re installed a new cartridge. You can search Google for “ink cartridge refill reset” to reset your specific printer model. Resetting tells the printer you’ve installed a new cartridge and it needs to reset the ink level indicators. This also (90%+ of the time) takes care of low ink/cannot print errors. Be sure to follow the specific instructions for resetting your specific printer.
Resetting the printer can be as simple as holding a button on the printer down for about 5 seconds. In the case of the MG series printer, this was the triangle button. This reset the ink levels and allowed me to continue printing with the refilled cartridge installed.
Ink errors can happen, but the good thing is that they often go away after a reset.
After doing the steps above — it worked. Here is a test print!
You can do these same steps for color cartridges, if you can find a refill kit for your specific cartridges. It’s worth saving hundreds of dollars. Most of the refill kits I’ve found include both the black and color ink refill kit for under $10. Remember, this can be messy so make sure you have gloves and an old towel to do the refill procedure.
Example Ink Refill Procedure Video:

More about author.